


Armada GFL3000 Ground Fault Locator New Review
Tracking and finding faults that are buried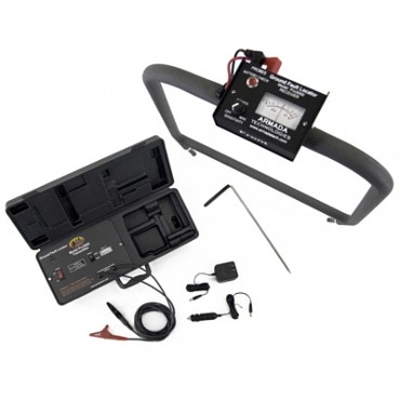 underground can be a painstaking task if you don’t have the right tools for the job. The Armada GFL3000 Ground Fault Locator fills this role splendidly as that is precisely what it was designed to do. The GFL3000 comes with two basic components, a transmitter and the receiver. The transmitter is easy to set up as you will connect one end to the wire you are trying to locate faults and then you would put a ground rod to find the leakage. Just like with Underground Cable Locators, it is very important to create a solid ground to get reliable results. If you are having trouble making good ground it is recommended to water the area you are grounding to increase your ground. Once a good ground is established you are ready to power on the receiver and find your faults. Before turning on the transmitter however it is a good idea to go over a few tips.
- The cable you are tracing to find faults has to have a known path. You will need a cable locator to find the path of your cable if it is unknown.
- The cable cannot be in conduit as it will not give reliable results due to interference by the conduit.
- The cable you are tracing must be disconnected at both ends and only be powered by the transmitter. This will allow the faults to bleed into the ground and be easily tracked by the receiver
Now that we have the basics out of the way we are ready to begin the fault location. Power on the transmitter and wait for it to beep, indicating that power is being supplied. The Armada GFL3000 Ground Fault Locator has a high and low voltage setting. Low voltage will be for locating large faults and high voltage will find both small and large faults. Now power on the Receiver and begin by the transmitter. You will push the receive rods into the ground along the path of the wire running in parallel. Looking at the needle on the display you will see it kick to either the left or right, this shows the direction the fault is. After each reading you will move further down the line until you see the needle kick in the opposite direction. This now indicates that you have passed the fault and you can begin taking smaller strides to narrow in and pinpoint your fault. Once the needle has stopped kicking this is the area where the fault is located. Before the fault is repaired, the system must be disconnected and powered off to eliminate the risk of injury or death. If you are tracking multiple faults, it is recommended to repair each fault as you go to eliminate kicks from multiple faults that can lead to confusion.
Hopefully this review has been helpful on how to locate faults for buried cable.
Cheers and Happy Testing,
-Sam
Add new comment