


Flir ONE Pro Thermal Imaging Camera Attachment for iOS Phones Review
Today I am reviewing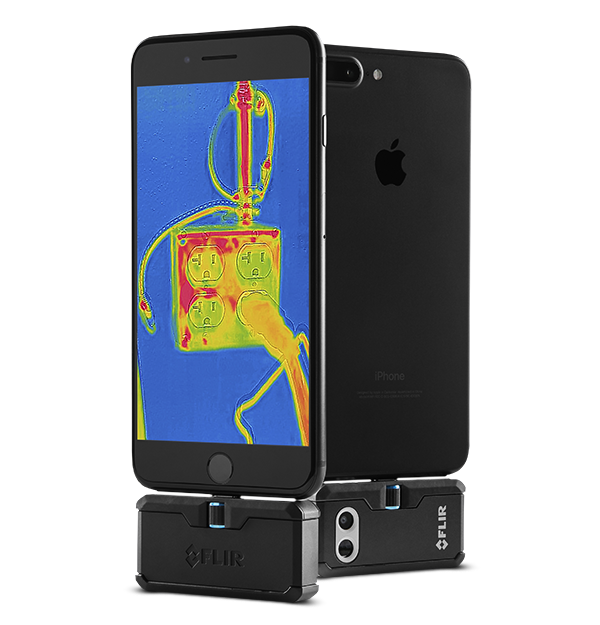 a very exciting product, the Flir ONE Pro Infrared Camera for iOS. The Flir ONE Pro is an extremely small infrared thermal imaging attachment that plugs into the charging port of your phone. It is great for finding energy inefficiencies, electrical problems, water leaks, pet safety, modified night vision, car diagnosis, even pest and wildlife locating, and much more. The applications are almost endless as long as the user has an application that revolves around temperature.
The Flir ONE Pro is definitely small and compact, but do not let that fool you. The Flir ONE Pro competes with even some of the more high-end cameras with its 160 x 120 thermal resolution; meaning the images are still very crisp and sharp. It can measure temperature between -4°F and 752°F (-20° to 400°C). Pictures are also much clearer and easier to understand with Flir’s MSX technology. MSX stands for “Multi Spectral Dynamic Imaging,” and it essentially is a combination of a thermal image and a normal photographic image. Without MSX, thermal images are usually very unclear and almost blob-like in appearance.
The latest Flir ONE Pro has some notable improvements over the original Flir ONE. The original model sometimes had problems reaching through phone cases, and was overall not as versatile. The Flir ONE Pro features an adjustable height connector, which Flir has aptly named the “OneFit” feature. This allows the camera unit to connect onto your phone even if you have a bulky case. Flir also improved upon its overall durability. The Flir ONE Pro is rated to safely drop from approximately a 6 foot drop.
Using the Flir ONE Pro is extremely user-friendly. Simply download the Flir ONE Pro app available on the App store, plug the Flir ONE Pro into your phone, and then press the power button located on the side of the Flir ONE Pro. The app will load up the live thermal image upon powering up the Flir ONE Pro. Inside the app, there are quite a few options and effects you can play around with such choosing whether to take a photo, video, panorama shot, or time lapse. The effects you can choose from are: Iron, gray, rainbow, contrast, arctic, lava, wheel, coldest, and hottest. I found “hottest” to be the most useful as it clearly points out the hotspot in the image. This is for more of the advanced users, but you can also adjust the emissivity, which is almost essential if you are measuring temperatures of different kinds of surfaces like a metallic metal vs. something dull like wood.
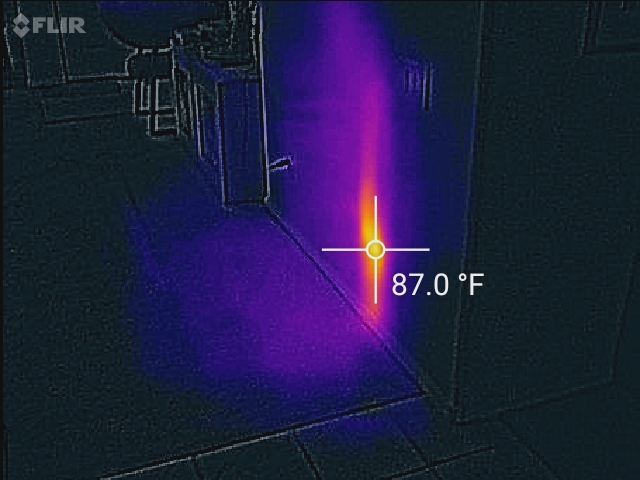
The Flir ONE Pro automatically adjusts and calibrates the thermal image as you use it, but if you are ever unsure about the image there is an icon in the upper left hand corner that manually resets the calibration. One of the coolest features I found in the Flir ONE Pro was the ability to apply different effects and view temperature data for all of the pictures I took. It is great if you just want to quickly snap some pictures and then analyze them more closely later on. Check out this hot water pipe I found in the wall when I was testing it out:
Overall, the Flir ONE Pro is a breakthrough in portability and convenience. Normally thermal imager cameras would just appeal to professionals, but the Flir ONE Pro appeals to a much broader audience in addition to professionals.
Can you think of any more cool and useful ways to use the Flir ONE Pro?
Add new comment